


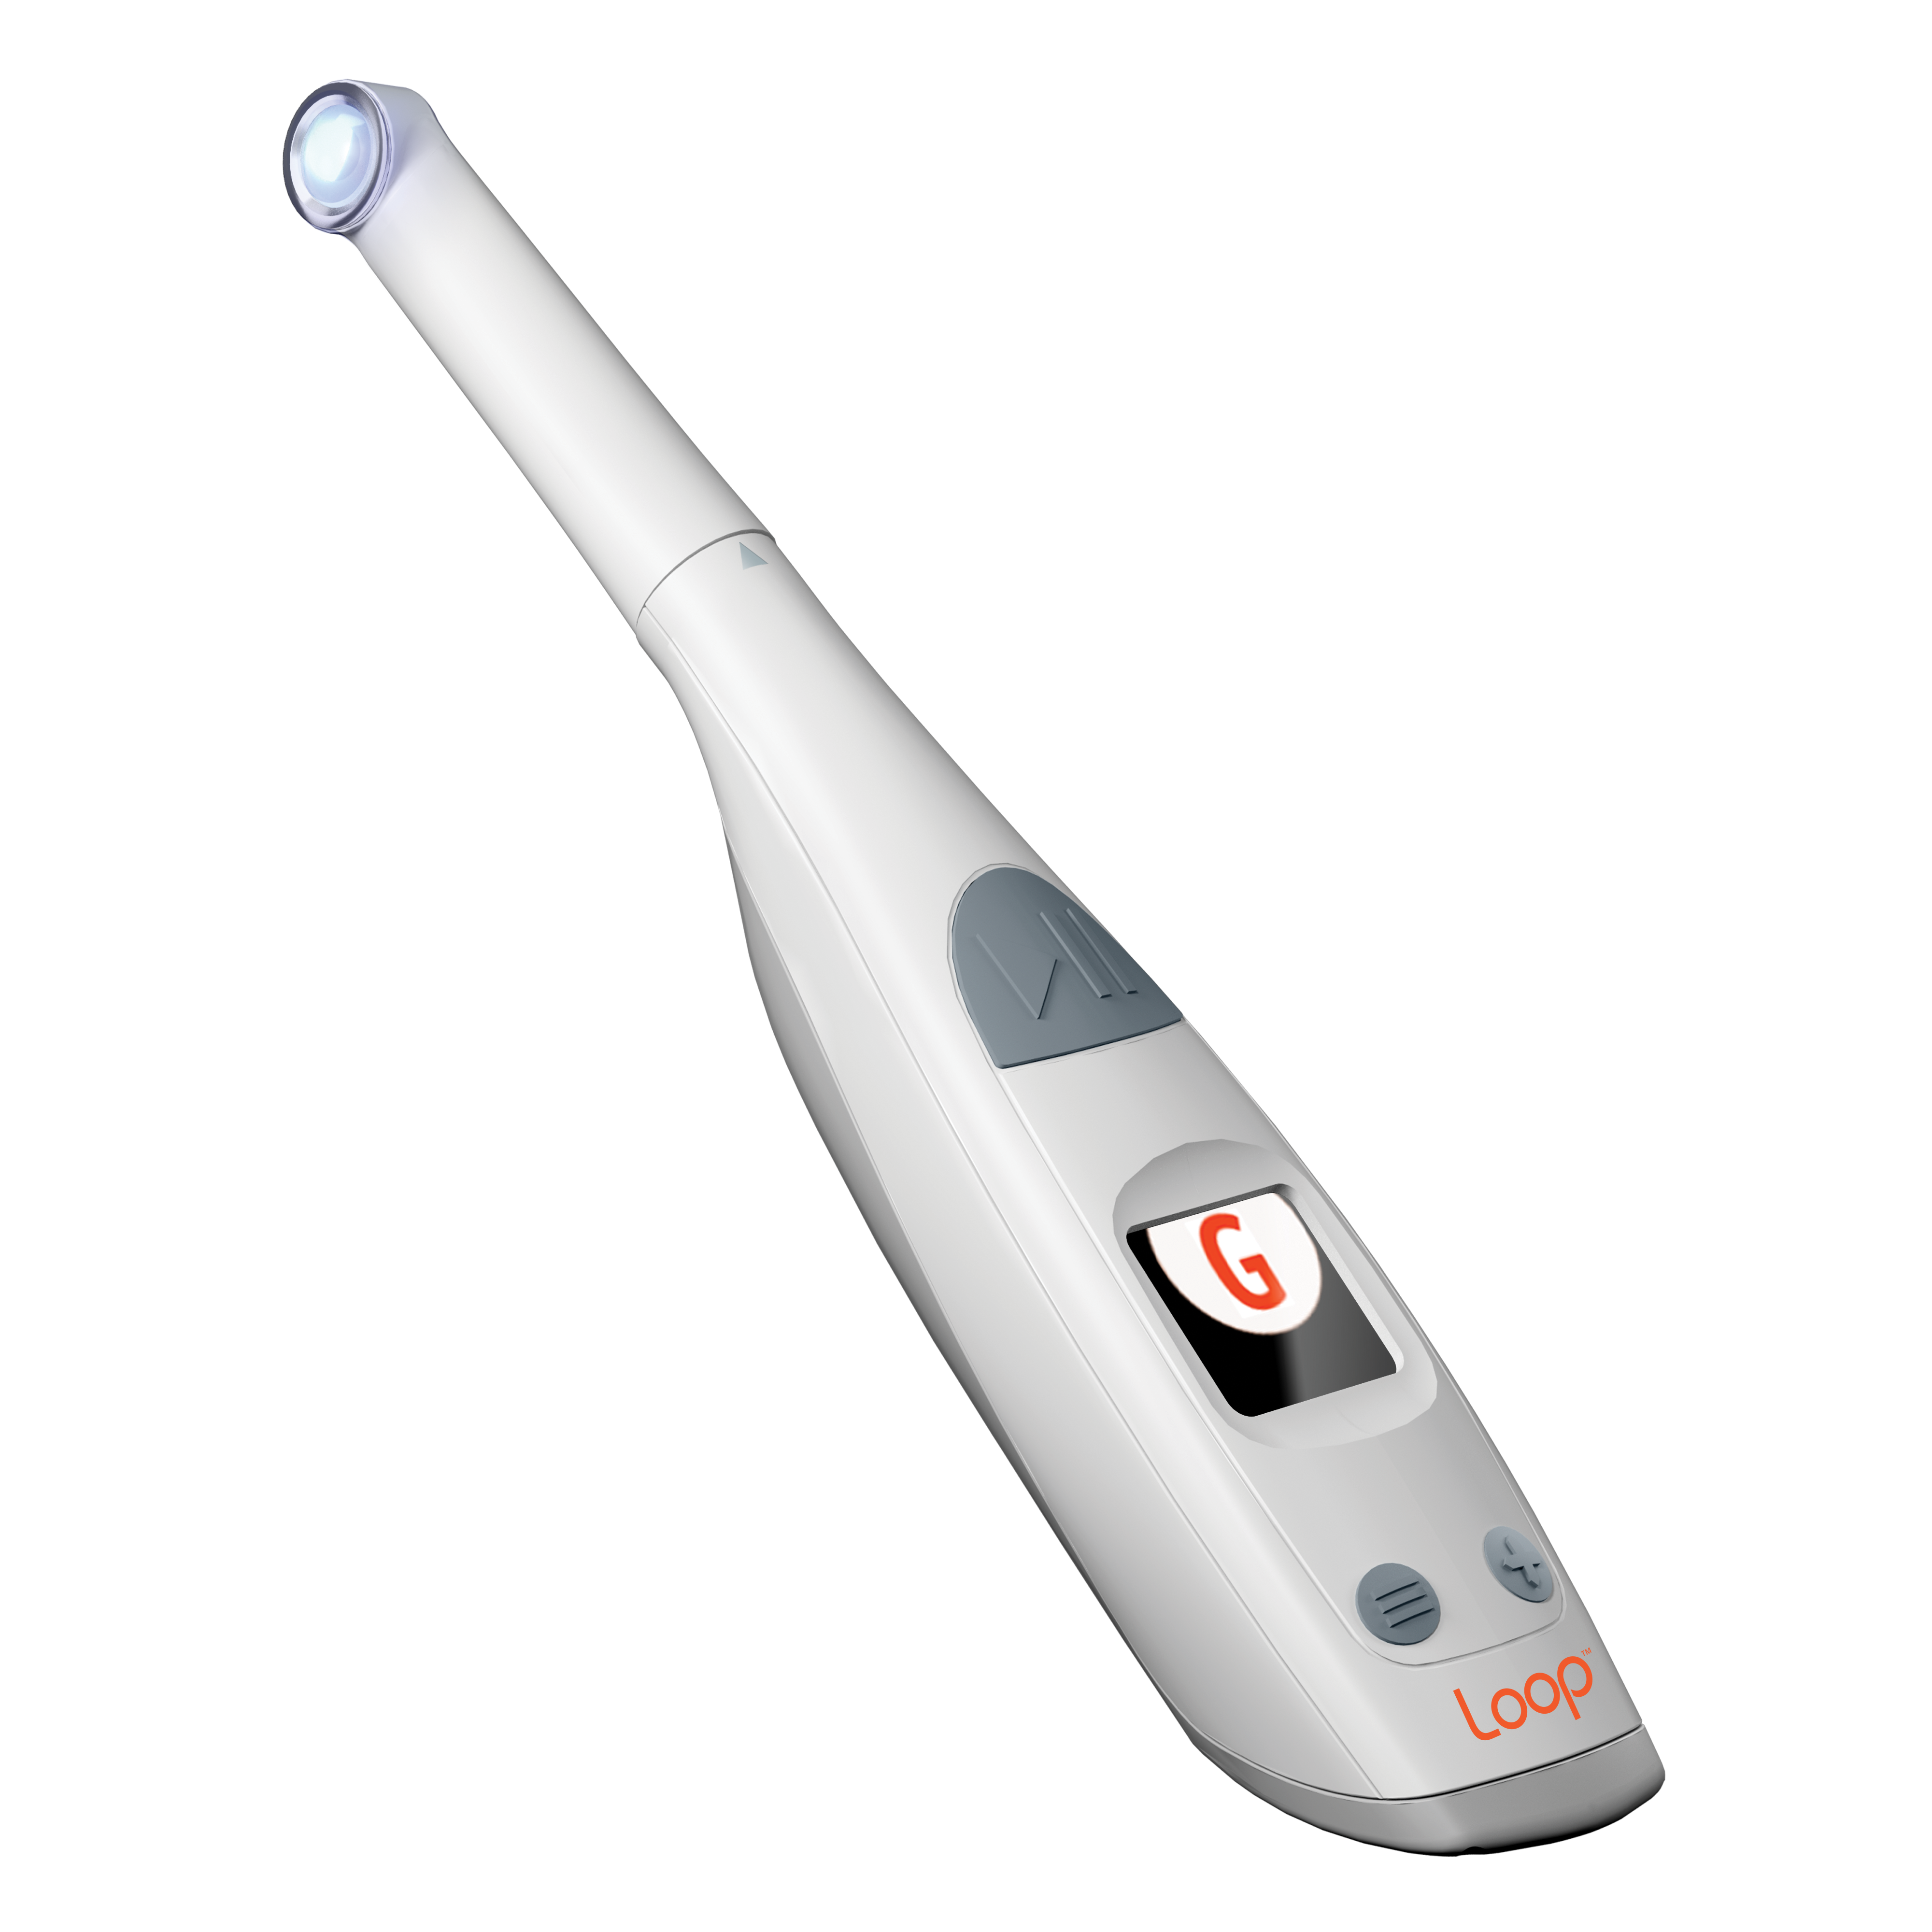
Loop™ LED Curing Light - Smart, Adaptive Curing Technology
NEW! Loop is not just another curing light. Utilizing Closed-Loop Technology, it's the first true innovation for light-curing in a generation.
Loop is the only curing light with real-time feedback that automatically adjusts power to deliver the precise energy dose required for an ideal cure, every single time.
Loop’s dual-calibration system ensures optimal performance. Full radiometer verifications guarantee a consistent power output, ensuring every cure is as precise as the first.
Key Features of Loop that you need to know:
- Adaptive Power Delivery - Patented Closed Loop Algorithm
- Self-Calibrating System for Consistent Light Output
- Broad Spectrum & Uniform Beam
- LED Display for Enhanced Usability
Curion is proud to be the exclusive distributor of Loop in Canada. This product is backed by the manufacturer's 3-year warranty.


-

Resources
Confidence in Every Cure with Loop™
Don’t risk under-curing or over-curing your restorationsResearch shows under-cured composites can lead to premature restoration failure.* Simply extending light cure time isn’t the answer — it can introduce heat stress and other complications.** |  |
| *Under-cure: | **Over-cure: |
|
|
 | Loop: The Key to Consistent, Perfect CuresFor optimal results, consistent light delivery is crucial. However, achieving perfect hand positioning and distance with a traditional curing light can be challenging. Loop takes the guesswork out of light curing. It’s the only curing light with real-time feedback that automatically adjusts power to deliver the precise energy dose required for an ideal cure, every single time.
|
Closing the LoopThe name Loop is inspired by the algorithmic feedback loop integrated into Garrison’s Adaptive Power Delivery circuit. This feedback loop serves as the heart and brains of Loop, dynamically adjusting the curing light output in real time. Closed Loop technology, developed and patented by Garrison, is the first true innovation for light curing in a generation. | 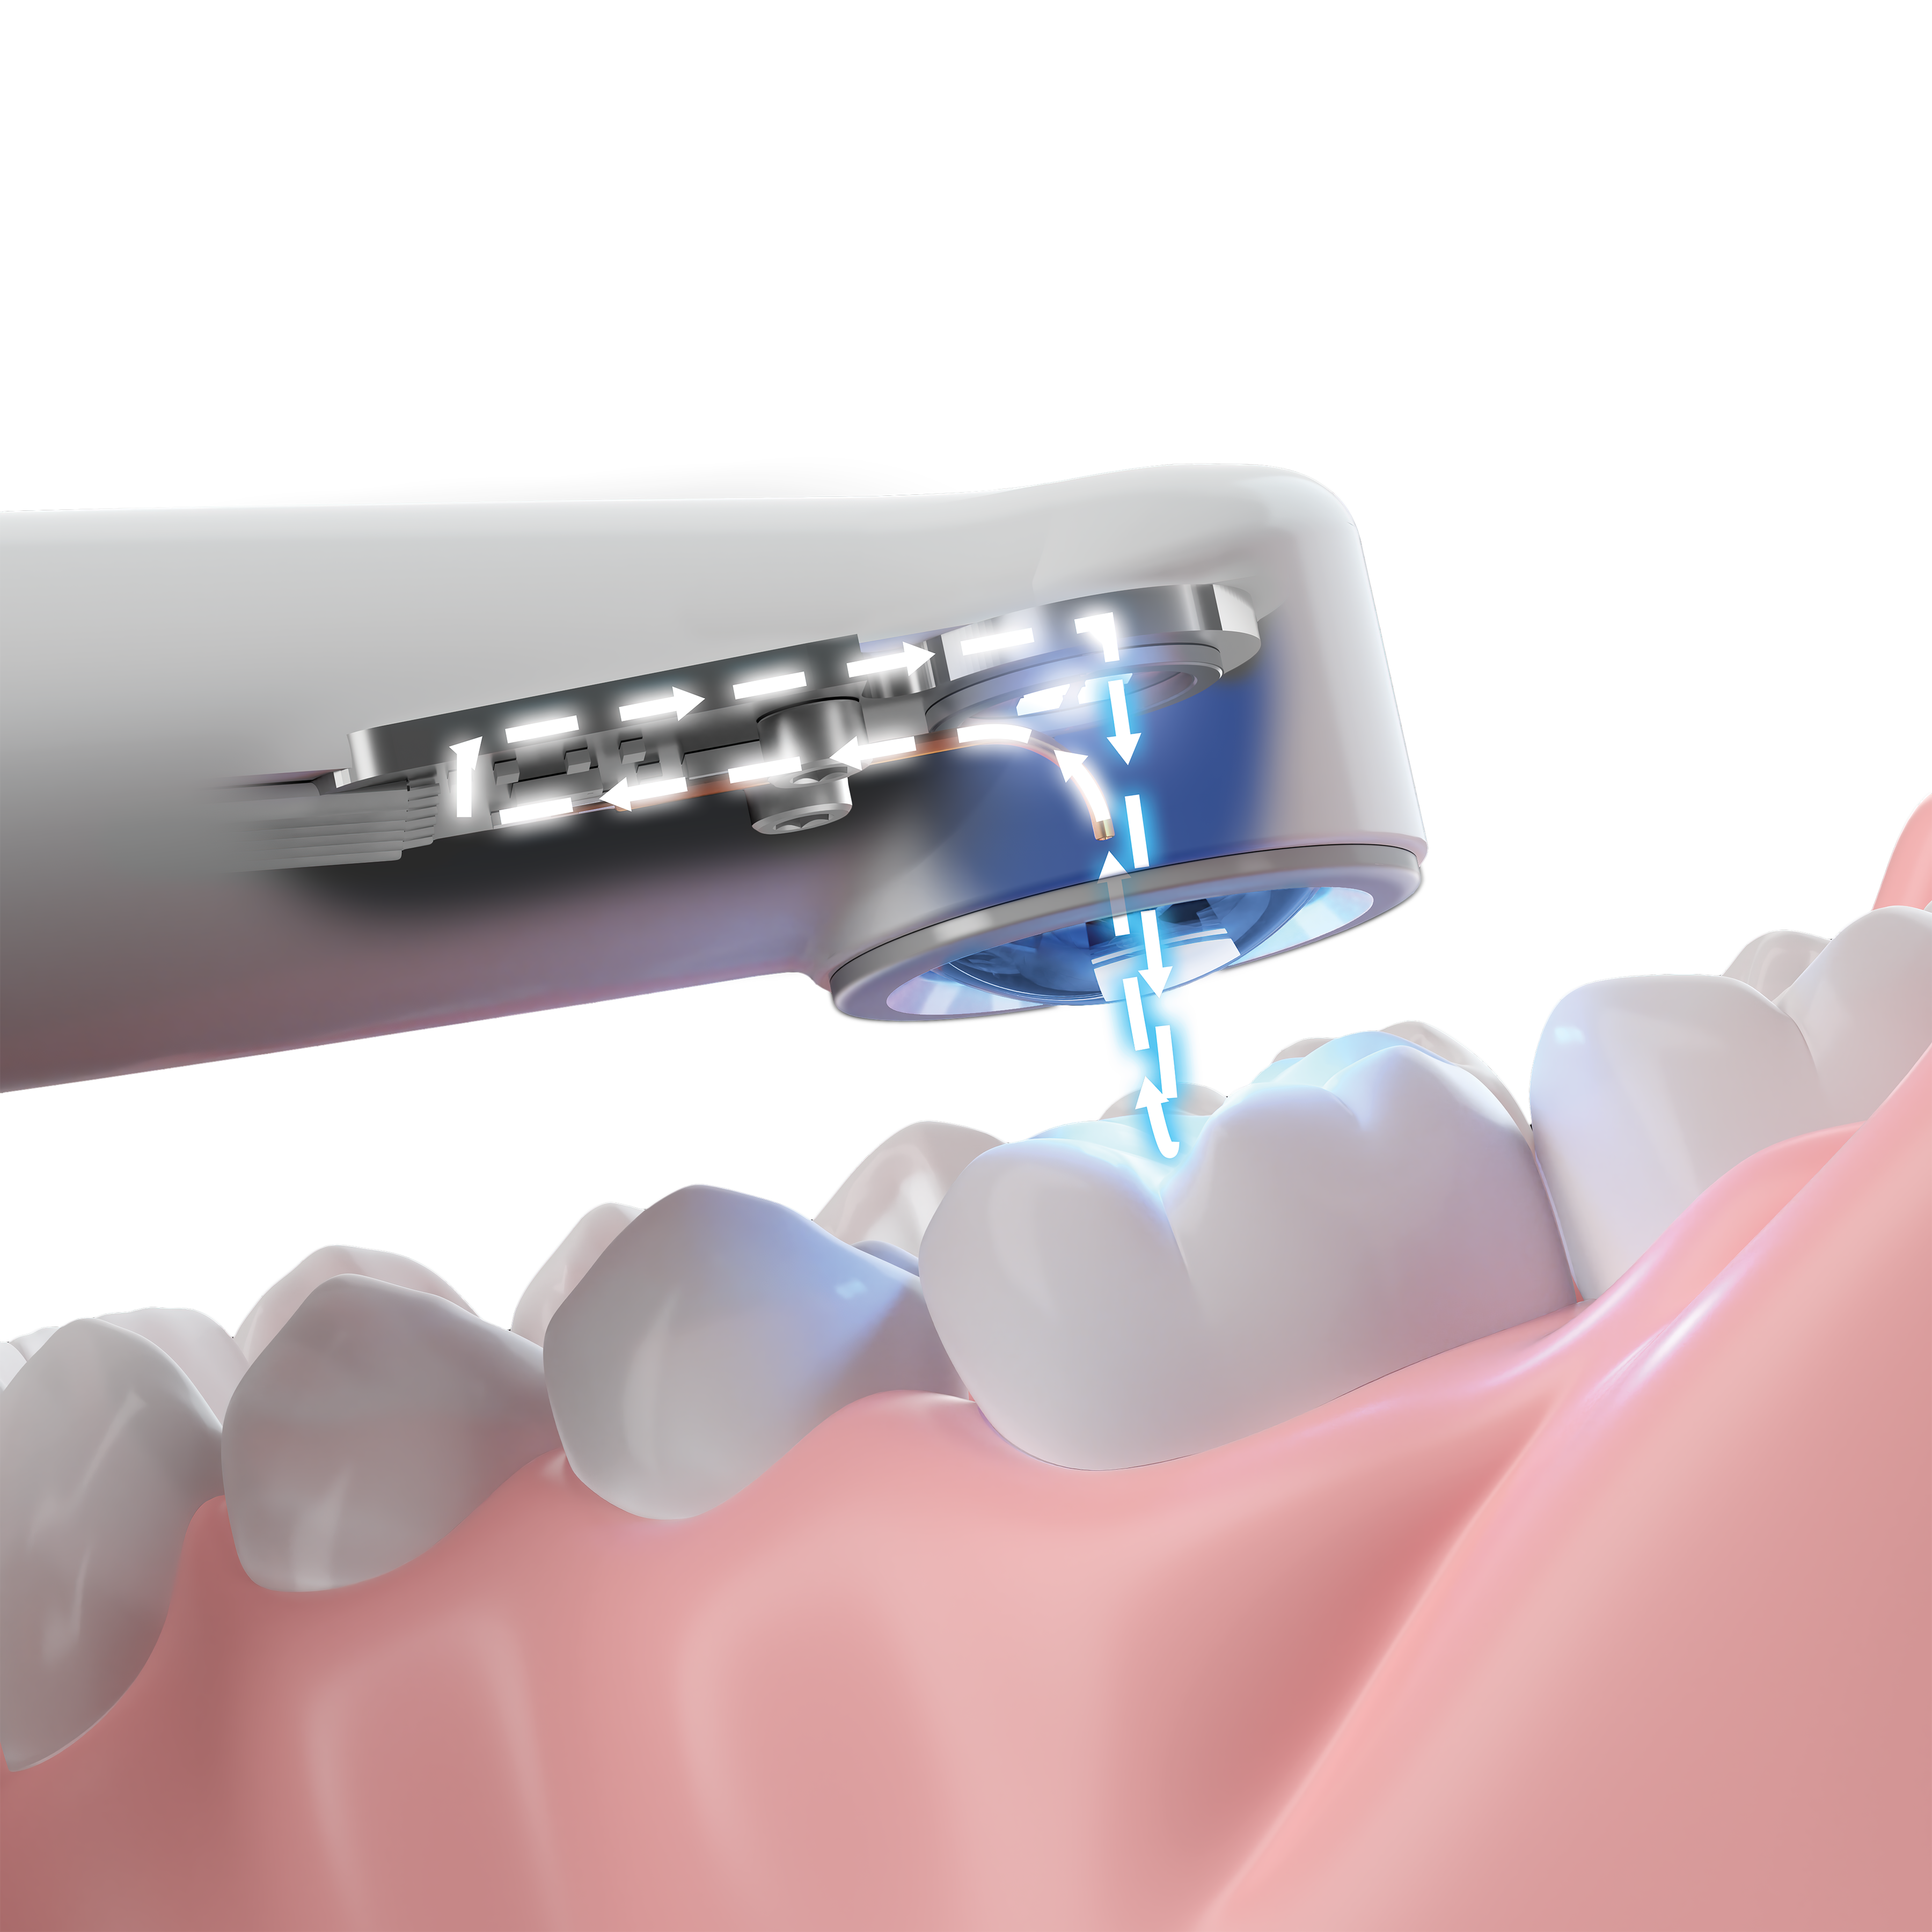 |
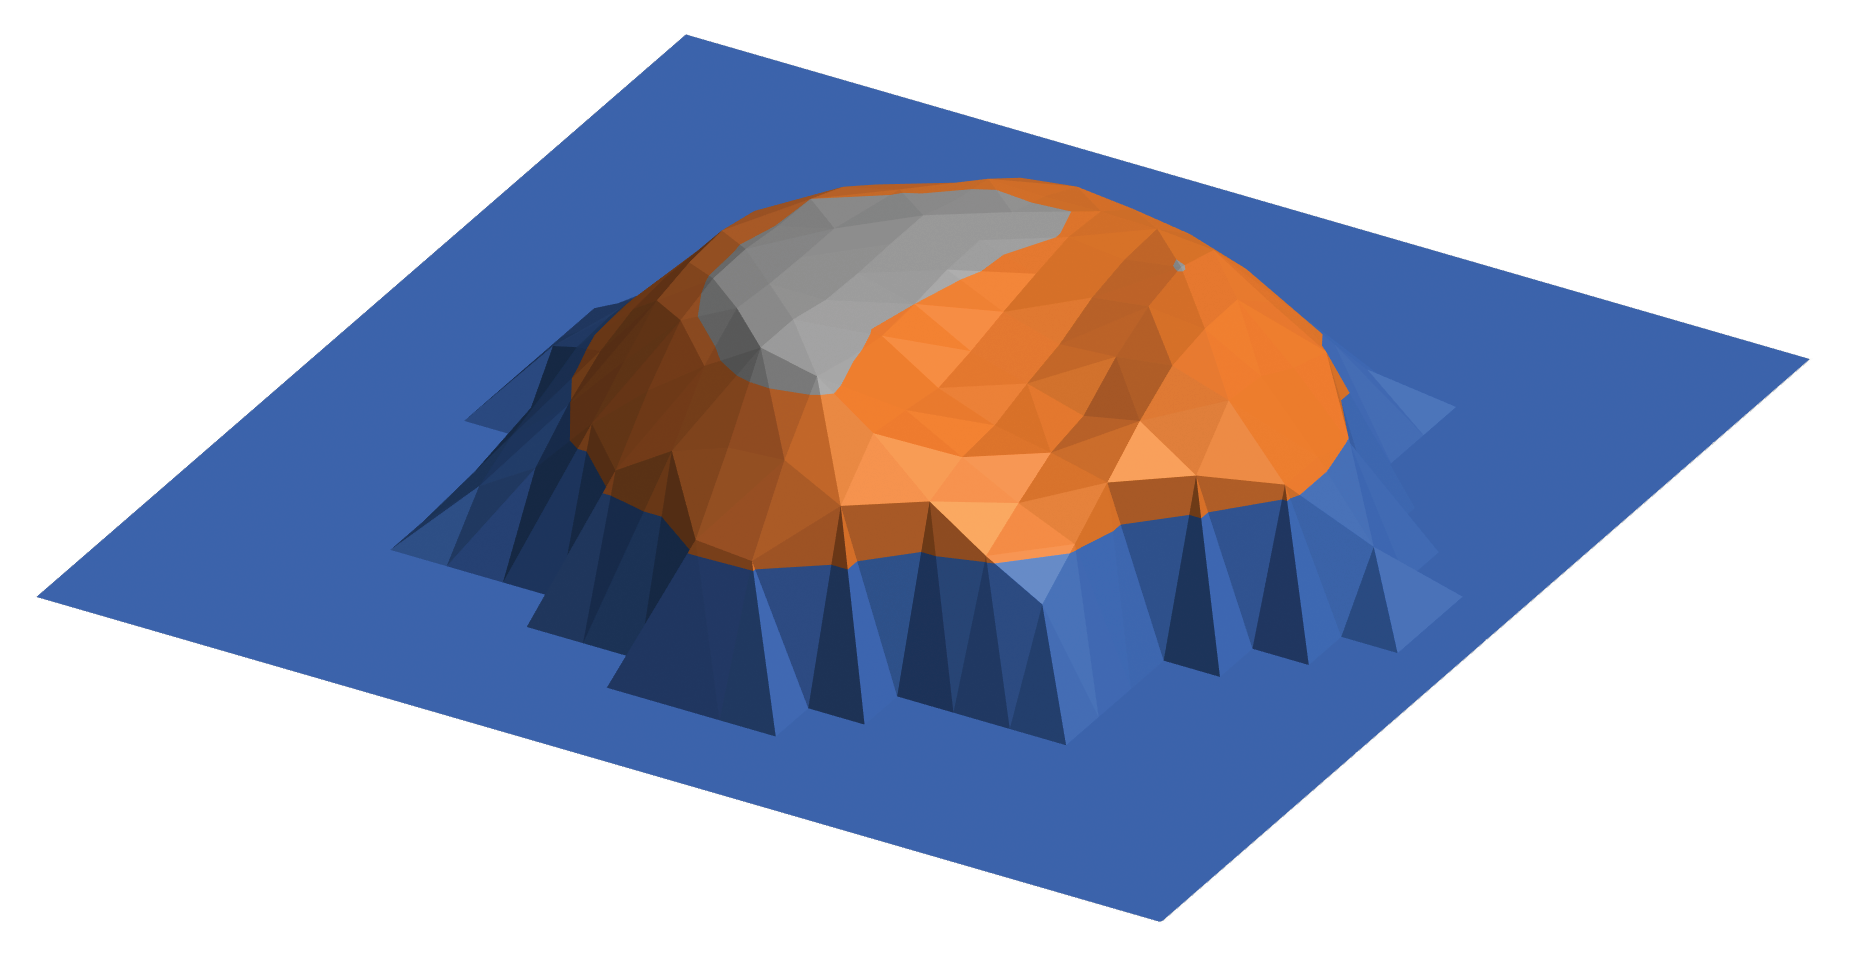
 | Closed loop algorithmAdaptive Power Delivery: Loop’s innovative circuitry and advanced closed loop algorithm measure the light reflected from the target surface. This reflected light is directed to the microprocessor, which calculates the actual irradiance on the surface more than 500 times per second. If any deviation from the desired irradiance is detected, the system automatically adjusts the power to the LEDs to compensate. This closed feedback loop maintains the optimal energy level at the target surface, ensuring a perfect cure every time. |
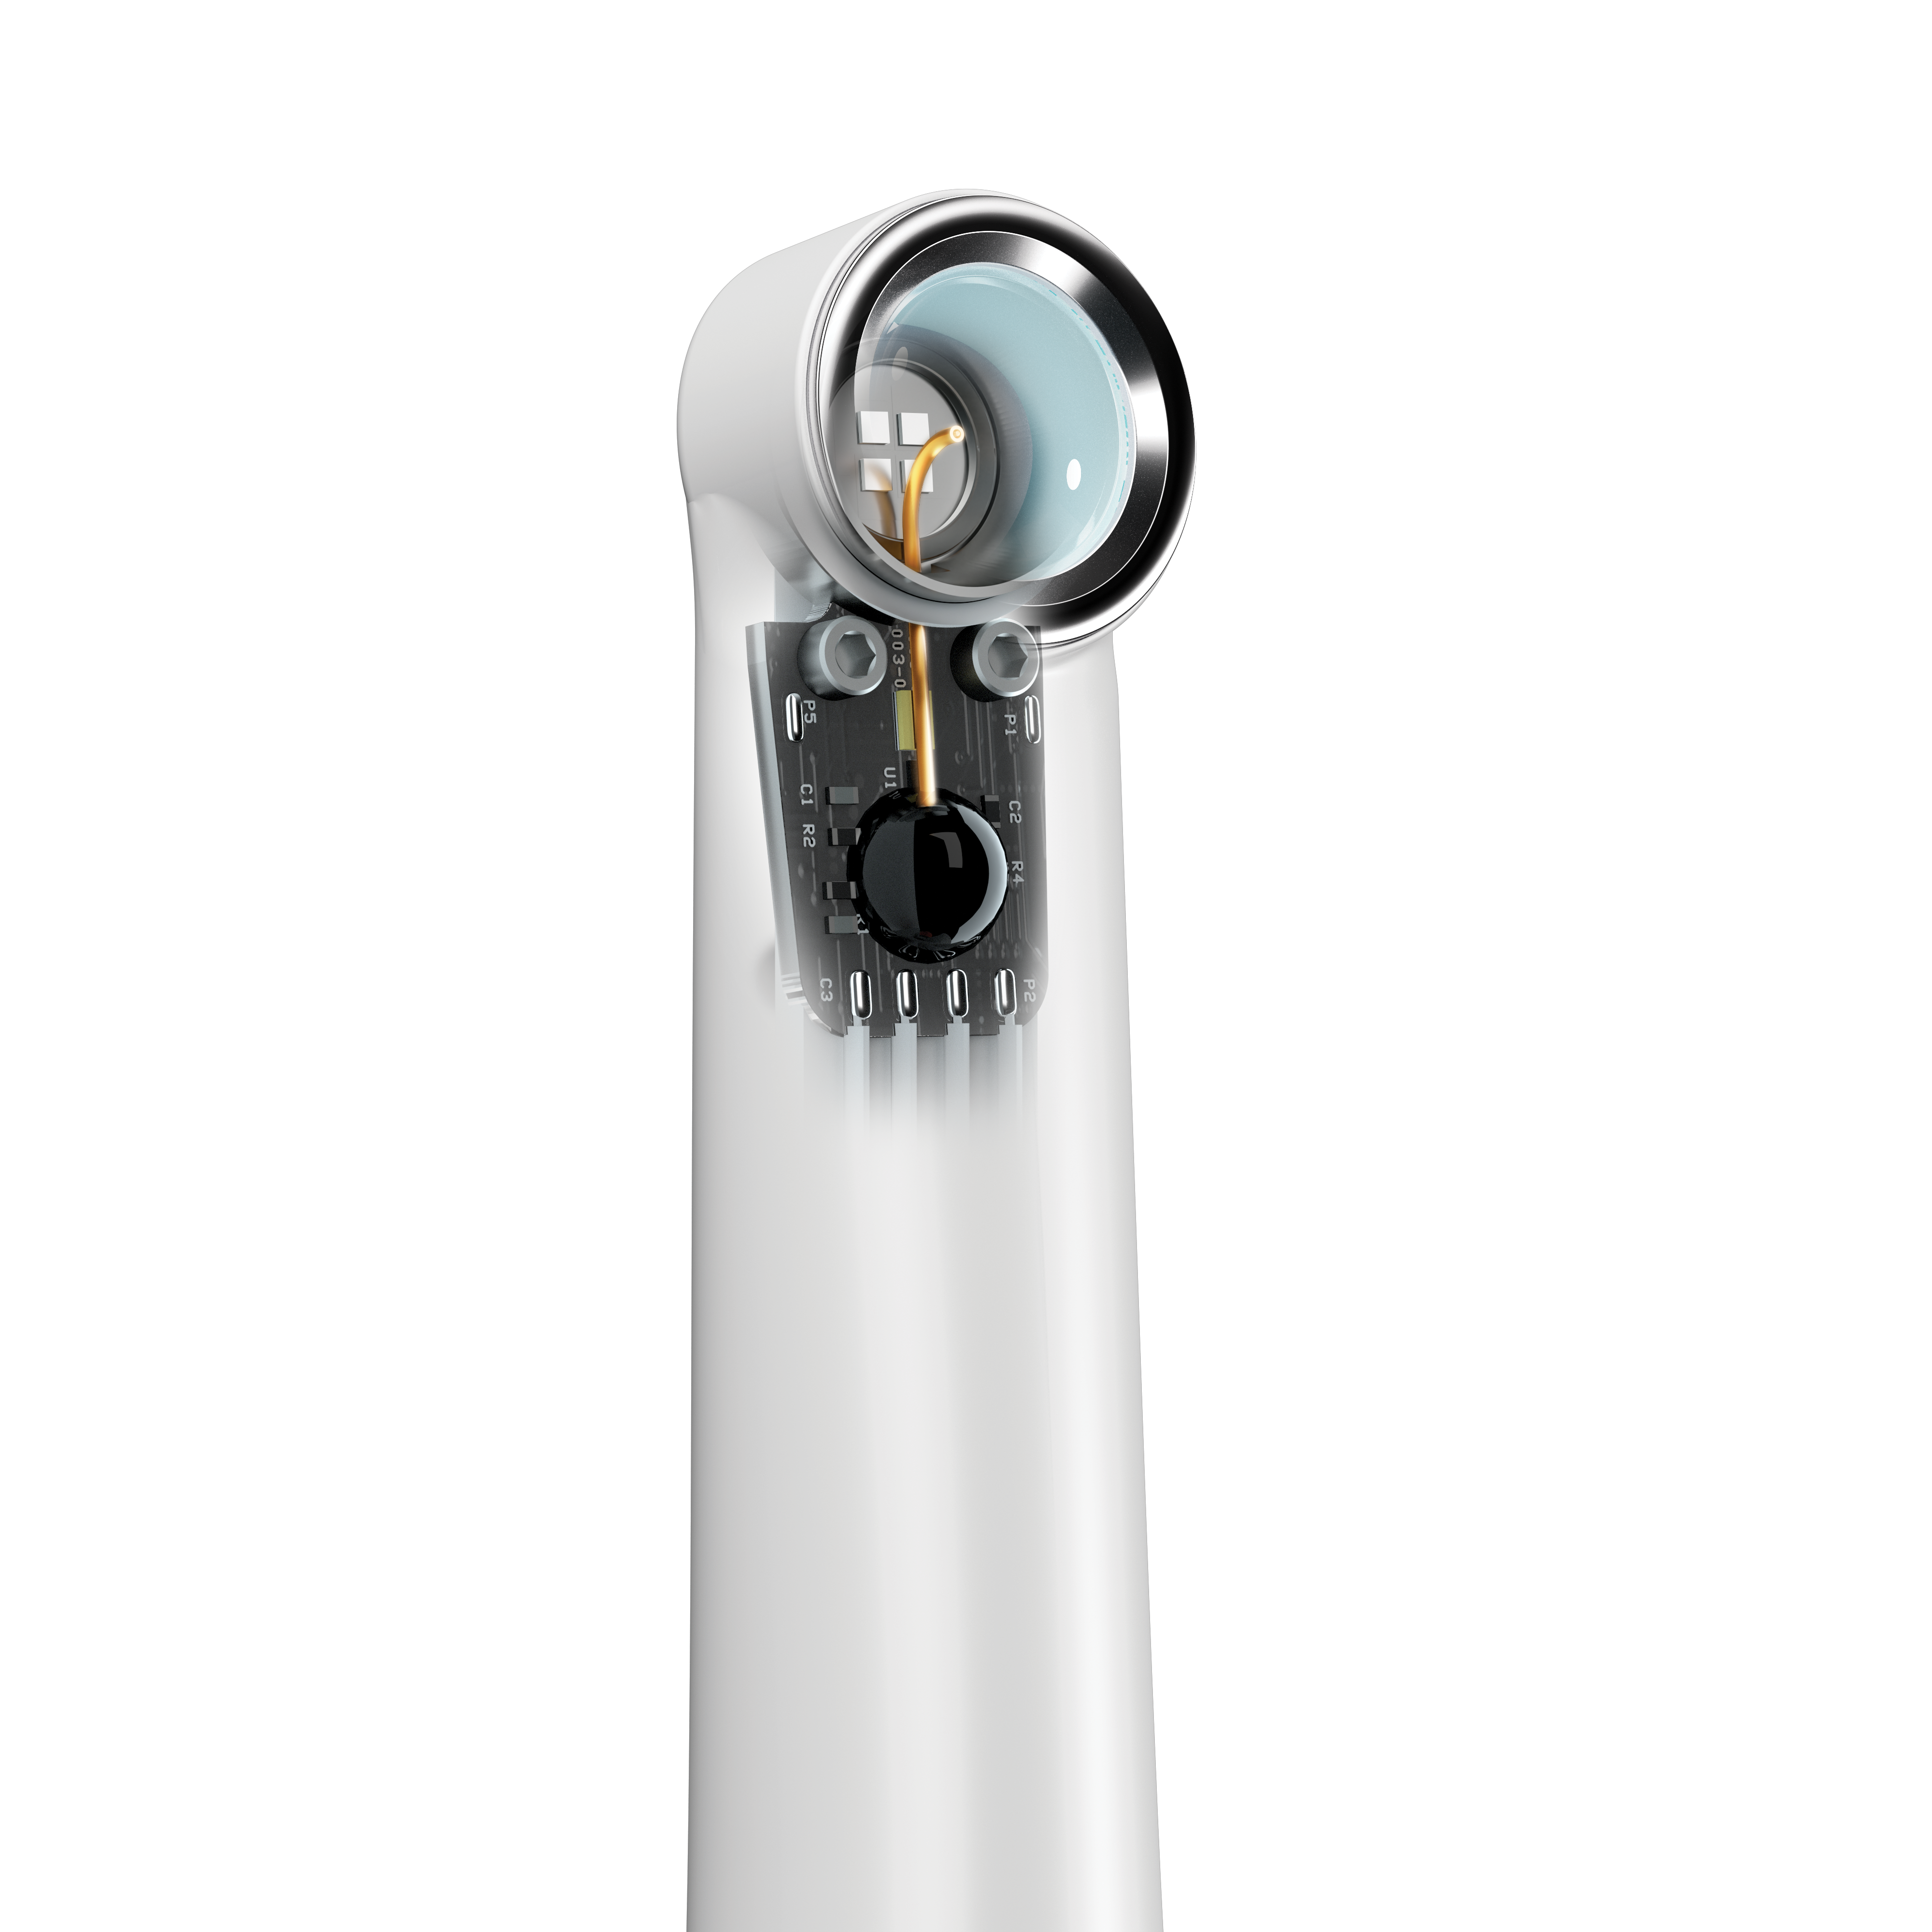
Precision Light Delivery:Loop is designed to deliver light only when it is properly aligned with the tooth. By pausing the curing process if the lens drifts too far from the target or is not correctly positioned before starting, Loop ensures the precise dose of light energy is delivered exactly where it is needed, preventing under-cured materials.
| 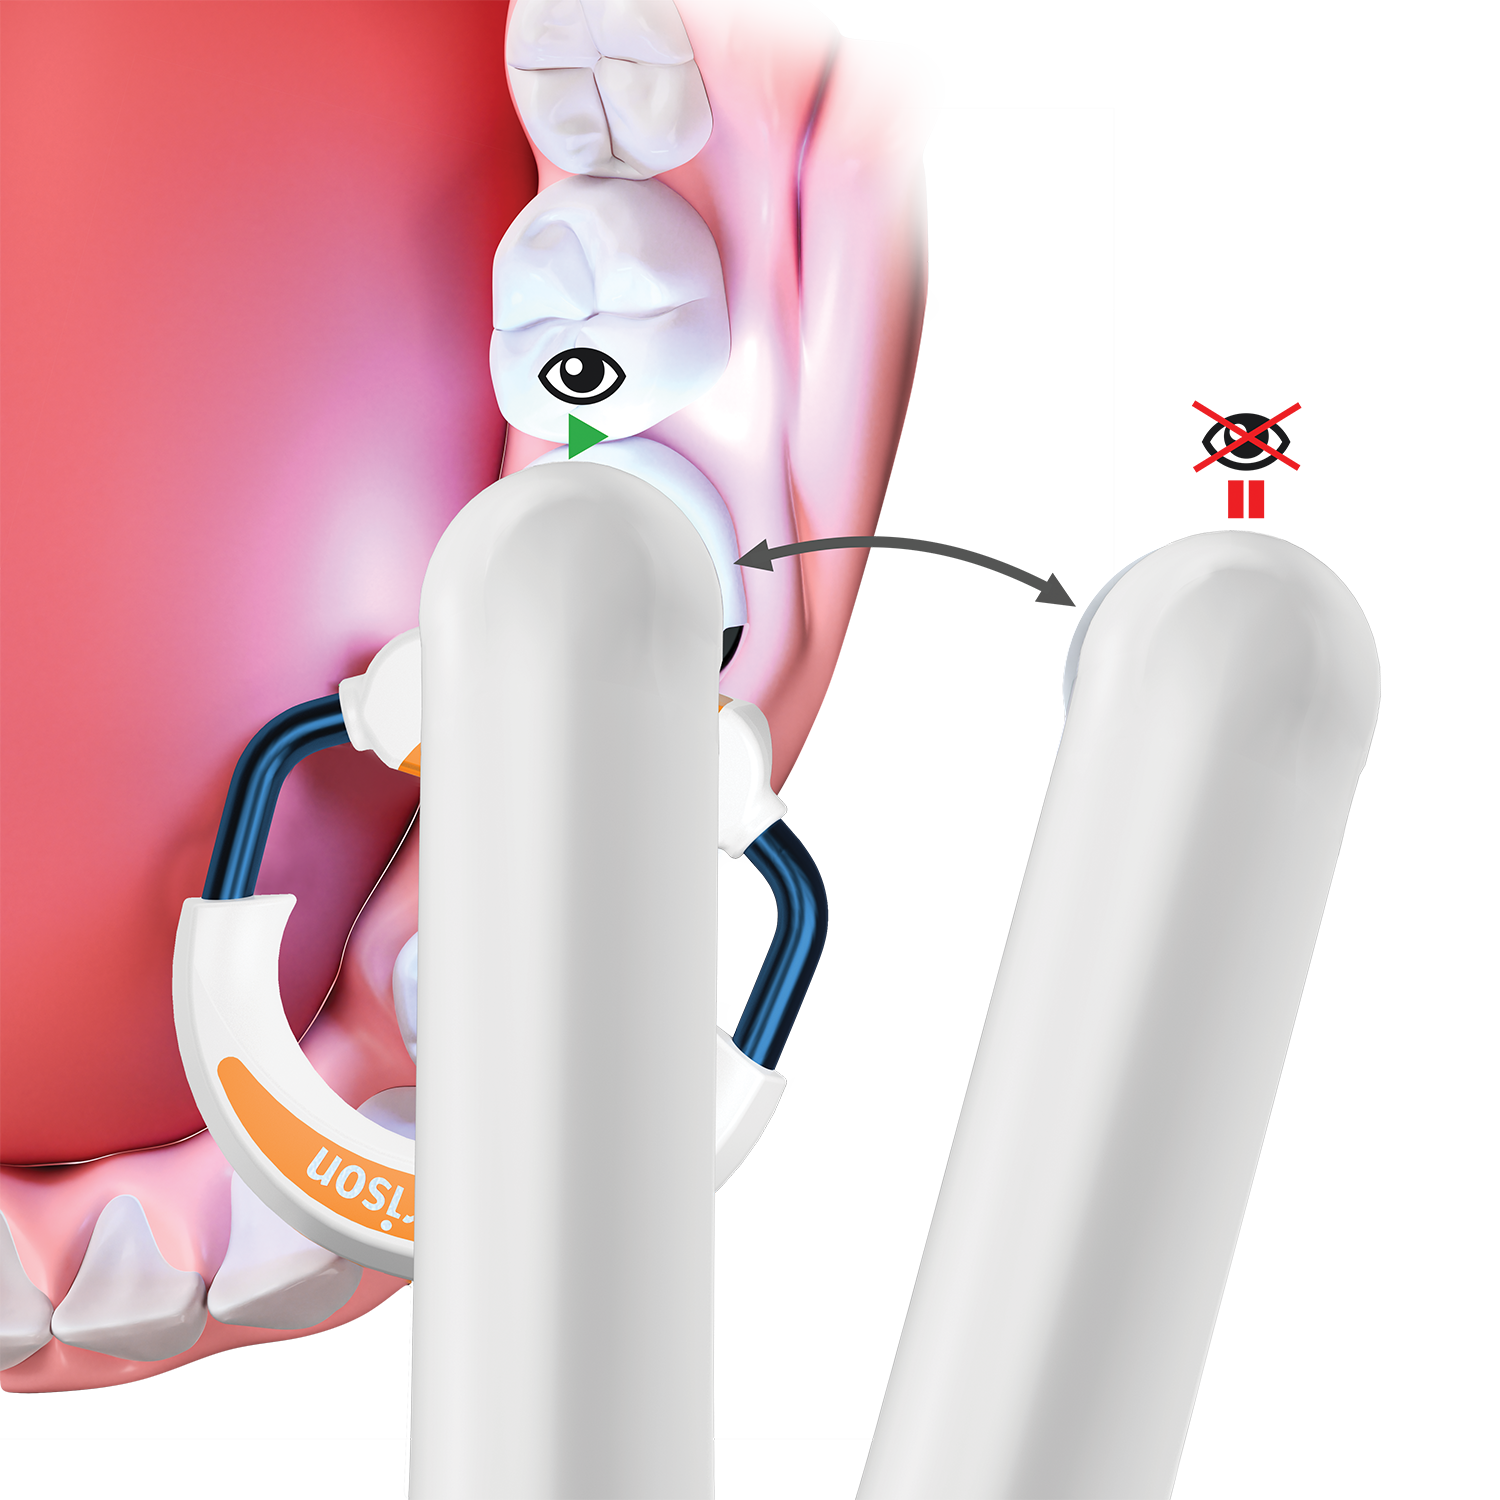 |

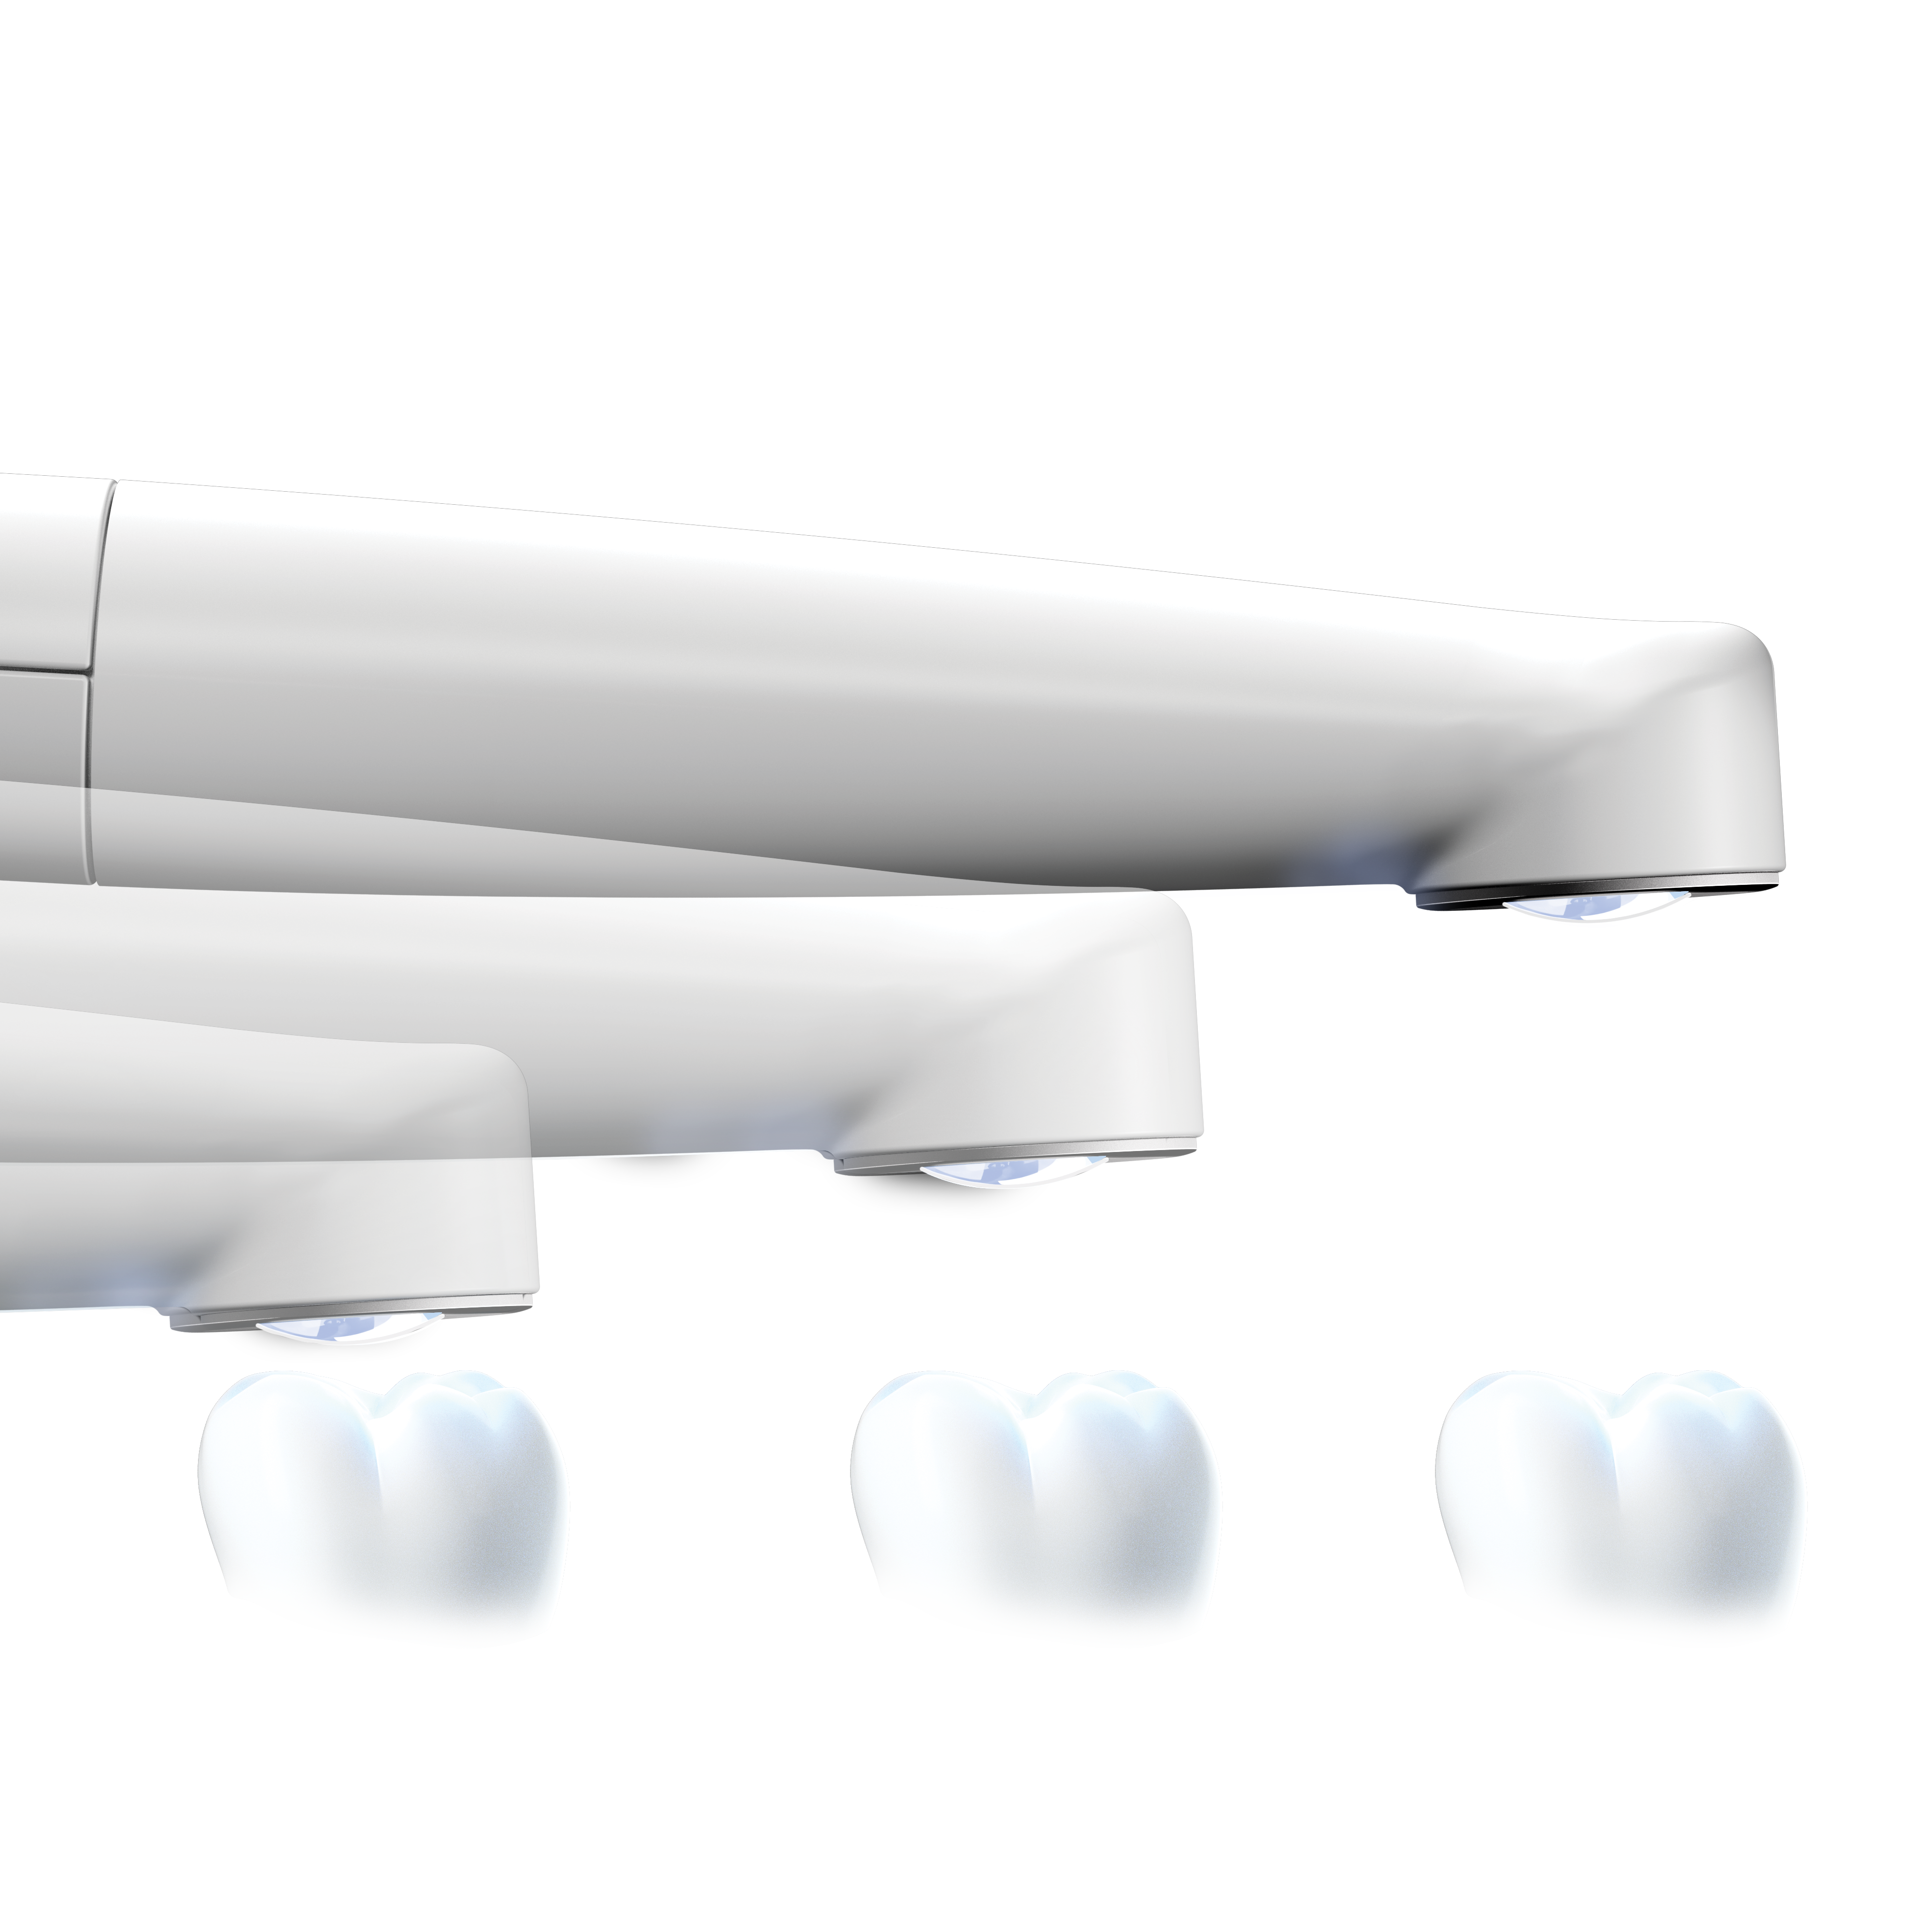 | Total Tooth Coverage:Loop starts with a substantial 9.7mm lens diameter, ensuring broad initial coverage. Thanks to its closed-loop control, it maintains the desired irradiance even when the beam expands due to increased distance. This means the effective beam width can be as wide as needed. Simply move the tip away from the target, and Loop will deliver an accurate dose of light energy to a much larger area, ensuring effective curing regardless of positioning.
|
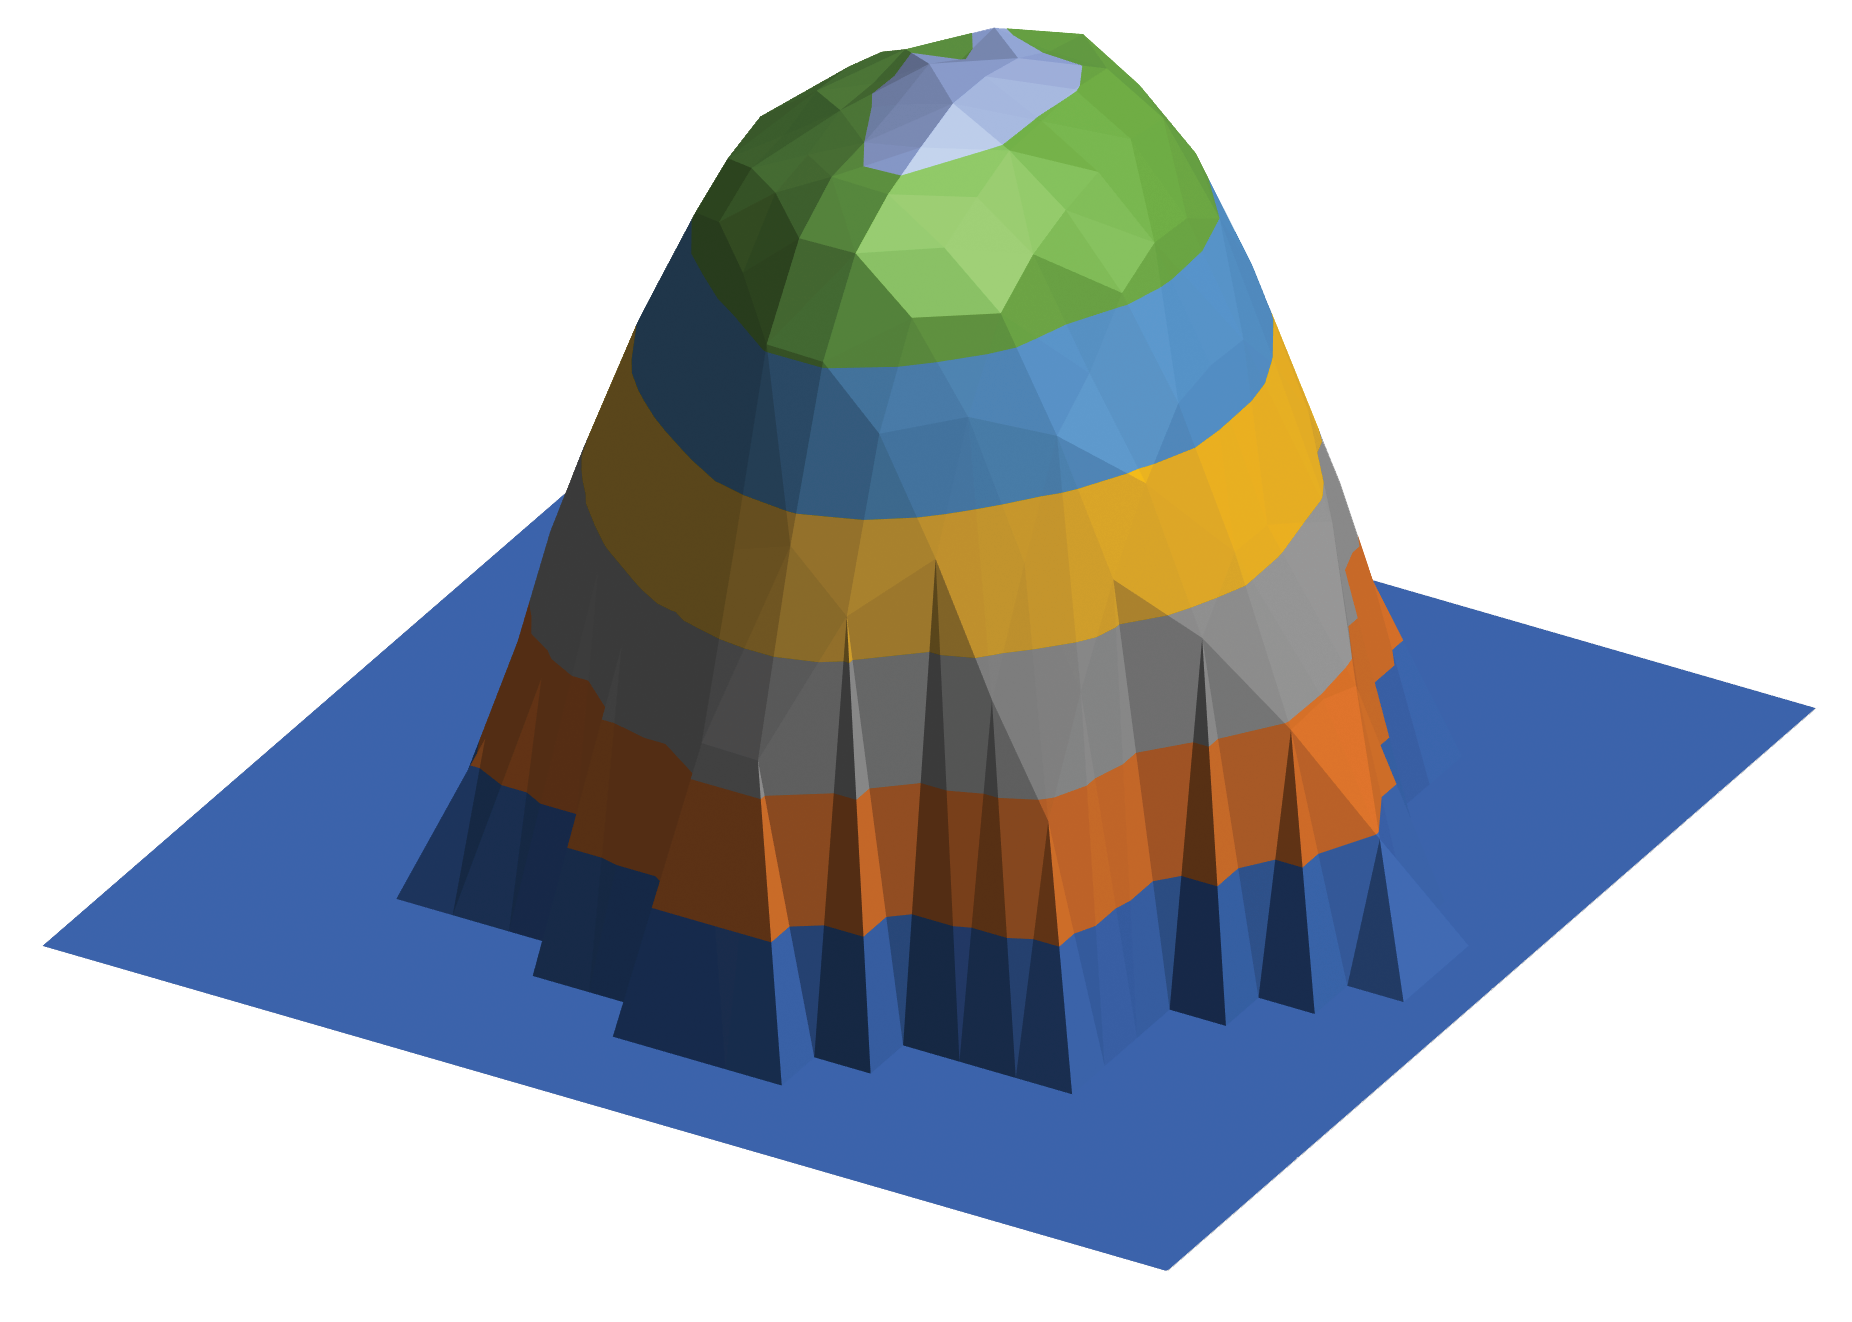
Broad Spectrum. Uniform Beam.Loop utilizes a dual-wavelength LED system, efficiently activating a broad range of photoinitiators between 390nm and 480nm. This innovative approach ensures spectral beam homogeneity, a concept where the light’s full spectrum is distributed uniformly across the entire beam. This translates to consistent curing across the entire restoration surface, regardless of the photoinitiator used in the material. | 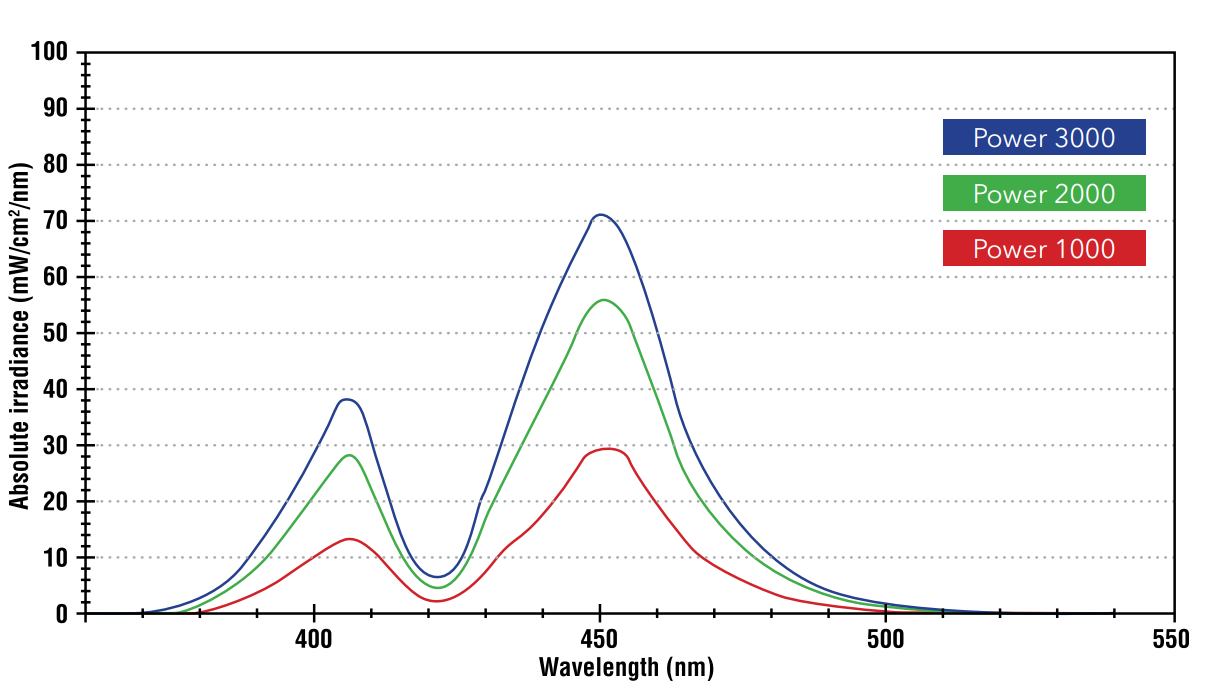
|

Self-Calibrating System
Loop simplifies curing light performance with its built-in self-calibration system, ensuring consistent light output throughout its lifespan.
| Daily Cleaning Checks: | Monthly Full Calibration: | ||
| Each time Loop is returned to its charging base, it performs an automatic cleaning check to ensure the lens is free from debris or scratches. If a minor issue is detected, Loop will notify you and attempt a self-correction. For significant concerns, the system will recommend a full calibration cycle. |  | To maintain optimal performance, a full calibration adjusts for changes in LED age, battery output, or lens issues. This process is recommended monthly or after repeated self-check dirty lens failures, cleaning hardened dental material from the lens, or missed scheduled calibrations. |  |
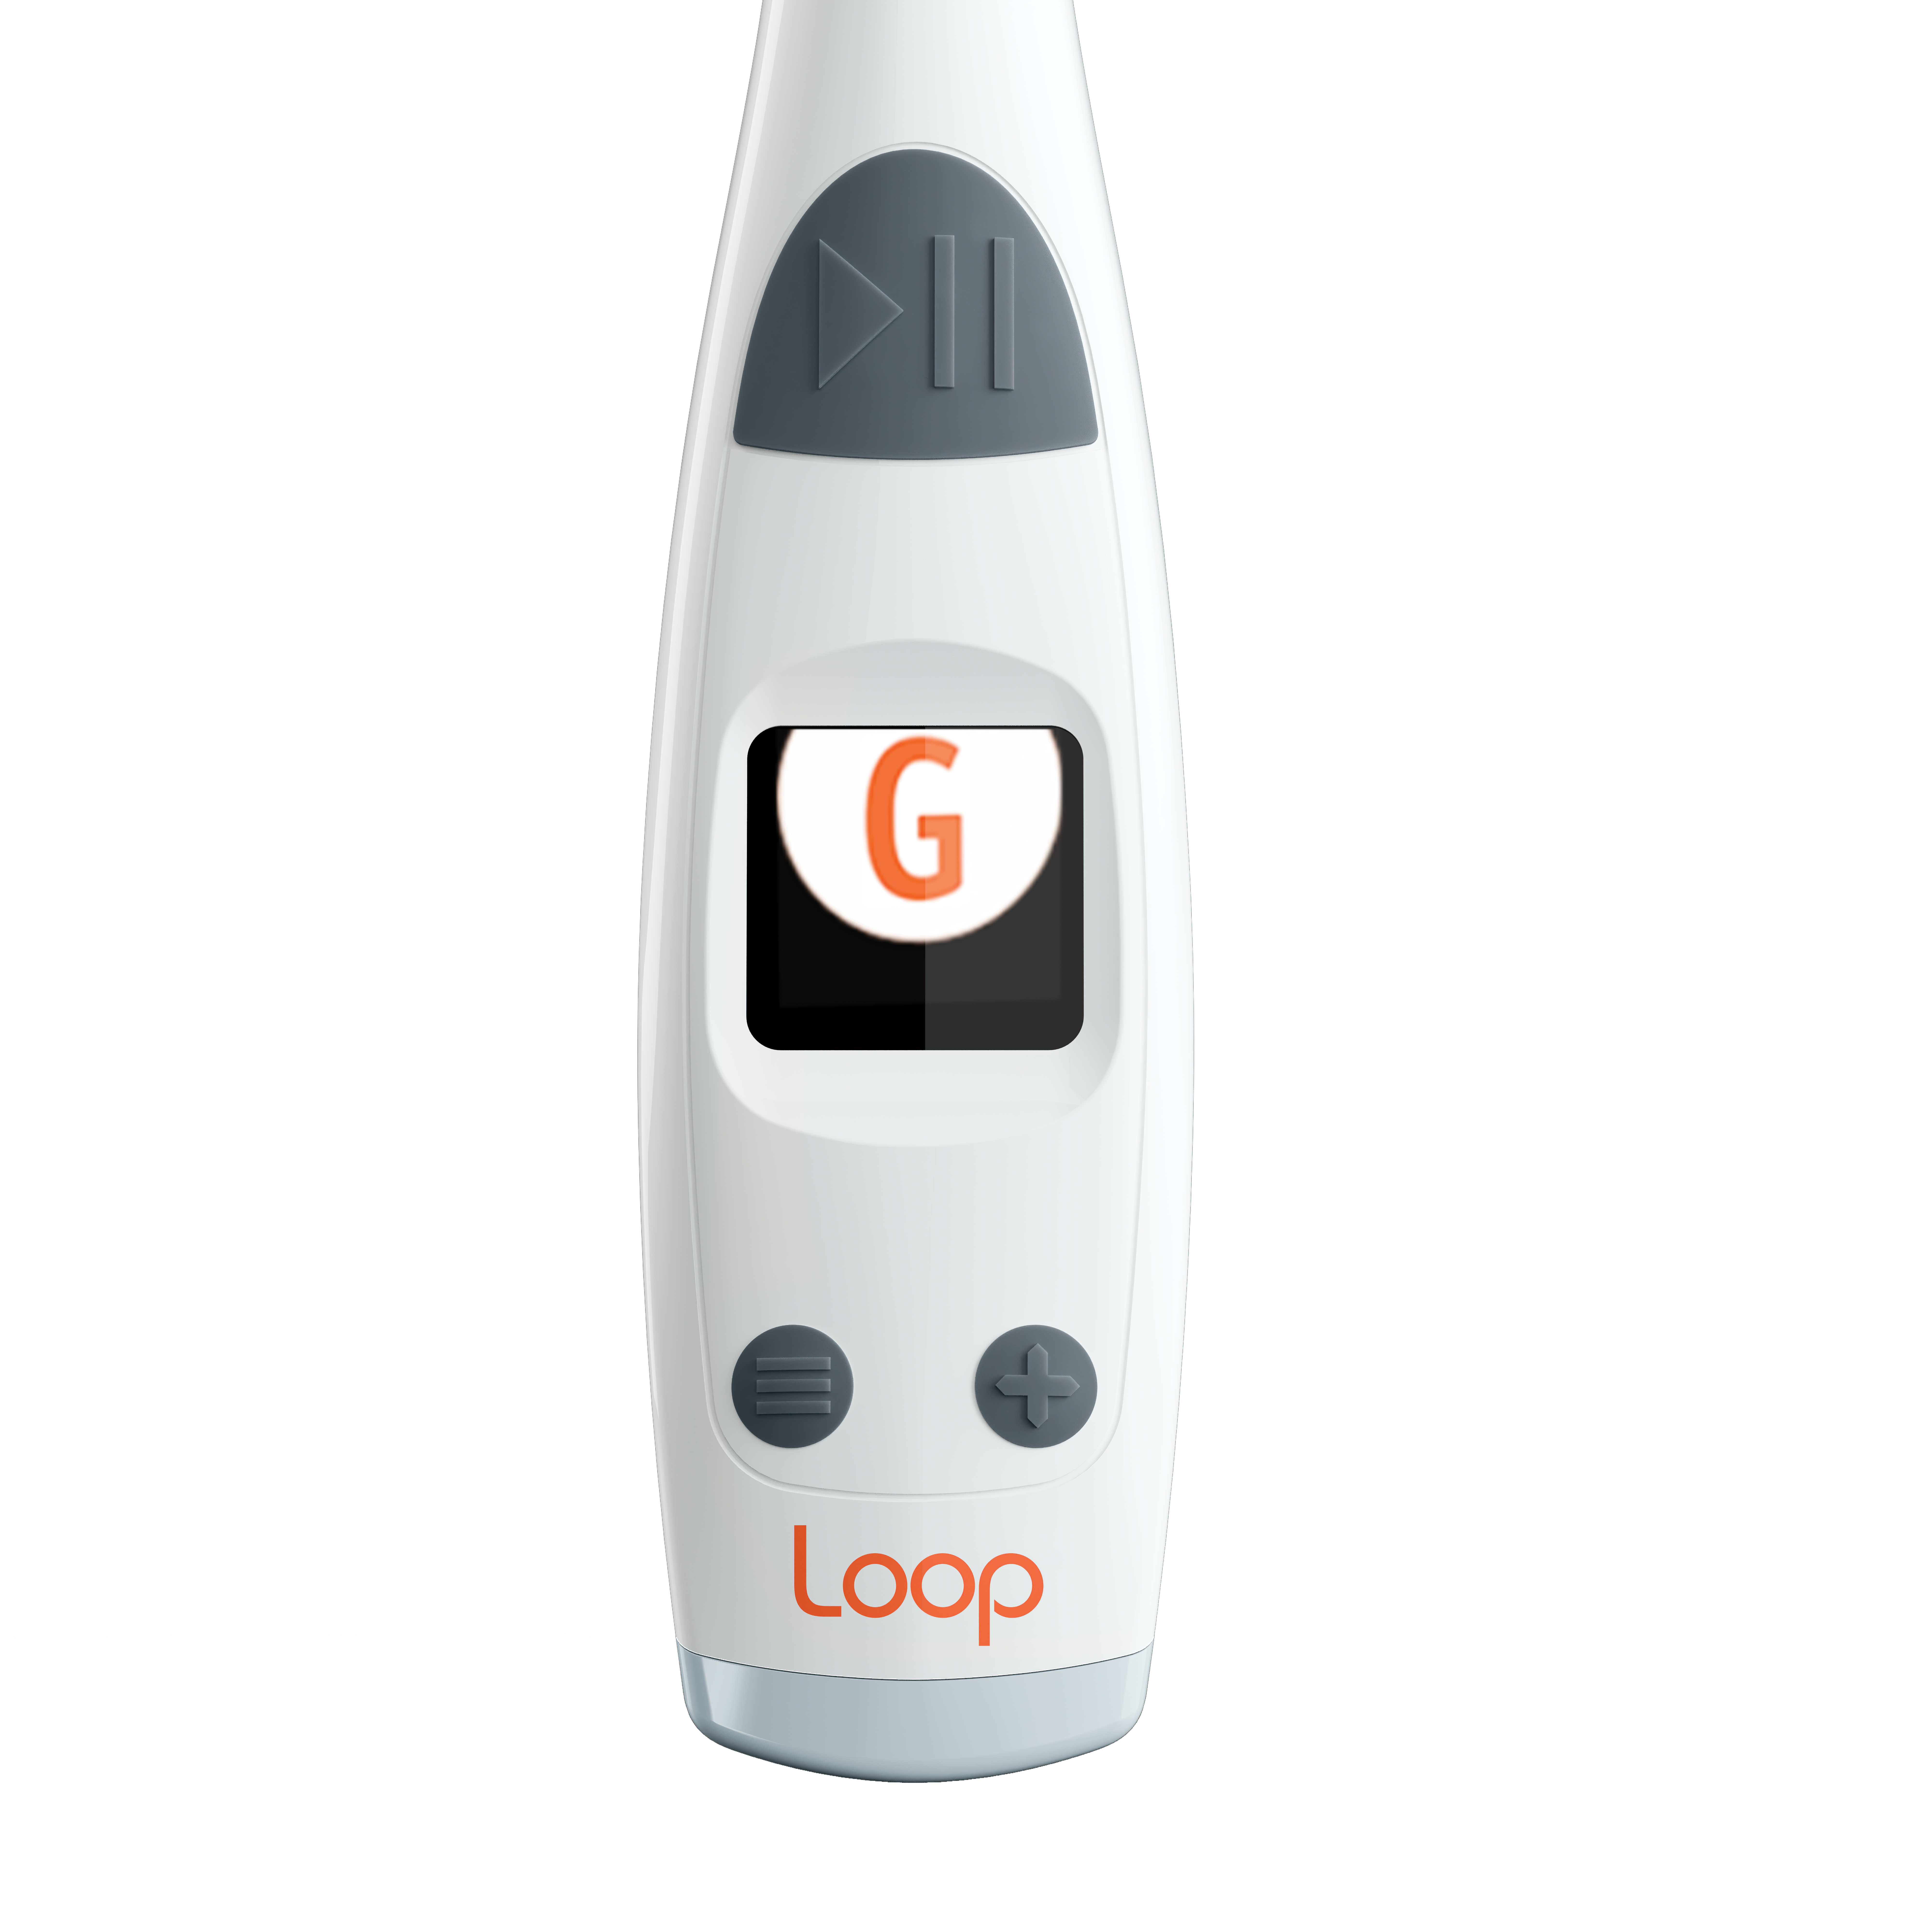 | LED DisplayThe Loop curing light features a full-color LED display that enhances usability with an intuitive control panel, allowing you to navigate and adjust settings effortlessly. It provides real-time feedback, giving you instant confirmation of selected modes, power output, and remaining cure time. This streamlined workflow enables you to verify every step, ensuring confidence and efficiency in achieving optimal results each time. |
Sources
*Rueggeberg, F. A., & Craig, R. G. (1988). “Comparative study of different light-curing units and their effect on surface hardness of dental composites.” Journal of Dental Research, 67(1), 118-121. *Peutzfeldt, A., & Asmussen, E. (2005). “Effect of curing time on marginal adaptation of composites in dentin cavities.” Dental Materials, 21(3), 242-247. *Ferracane, J. L. (2006). “Effects of composite formulation and curing protocols on polymerization shrinkage stress.” Dental Materials, 22(3), 211-222. | **Braga, R. R., Ballester, R. Y., & Ferracane, J. L. (2005). “Factors involved in the development of polymerization shrinkage stress in resin-composites: a systematic review.” Dental Materials, 21(10), 962-970. **Bouschlicher, M. R., Rueggeberg, F. A., & Wilson, B. M. (2004). “Effect of degree of cure on the wear resistance and hardness of a dental composite.” Journal of Biomedical Materials Research Part B: Applied Biomaterials, 71B(2), 349-354. **Sulieman, M. (2005). “The effect of high-intensity light-curing on the temperature rise in dental pulp chambers and the cytotoxicity of light-cured dental materials.” Journal of Dentistry, 33(2), 179-186. |
Loop LED Curing Light - Quick Start Guide
Loop LED Curing Light - User Manual
Loop LED Curing Light Troubleshooting Guidelines
| Issue | Recommended Solution(s) |
| Curing Light is Locked in Shipping Mode | To unlock from Shipping Mode, follow the Calibration and Dirty Tip Steps in the row below. |
| Trouble with Calibration and Dirty Tip (Section 4.4 of the IFU) | Ensure that the charging station is plugged in, and that the indicator led is green. |
| Dirty Tip Check - Ensure that the Charging station has the top in the lowest position for Dirty Tip Check. | |
| Using the micro-fiber cloth gently wipe off the Curing Light lens. | |
| Insert the curing light into the charging station. The Curing Light should automatically proceed and then show a display including a check mark for success. If a dirty icon appears, repeat the last 2 steps a 2nd time. | |
| White Calibration - Remove the Curing Light from the Charging Station. Lift the post on the Charging Station to the White position. | |
| Insert the curing light into the charging station. The Curing Light should automatically proceed and then show a display including a check mark for success. If a dirty icon appears, repeat the last 2 steps a 2nd time. | |
| If the Curing Light does not respond correctly contact customer support for further assistance. | |
| Curing Light Display Does Not Turn On | Ensure that the charging station is plugged in, and that the indicator led is green. |
| Inspect the charging port for any debris or damage. | |
| Insert the curing light into the charging station. The Curing Light display should display, calibrate, and begin to charge. If the Curing Light is not fully charged, allow it to remain in the charging base for a minimum of 30 minutes. | |
| If the Curing Light display has not turned on immediately contact customer support for further assistance. | |
| Error Messages on Display or the Curing Light is resetting. | Refer to the user manual for the meaning of specific error codes. A indicated, some errors require cleaning, calibration, or battery charging. All others should be noted and then contact customer support for further assistance. |
| Curing Light Not Reaching Full Curing Time | Check the device settings to ensure correct curing time is selected. |
| Ensure that the Start button is pressed and then immediately released. Note that a press and hold is a 3 second Tack operation. | |
| Clean the lens, do a dirty tip check and then a white calibration. | |
| If the issue persists, contact customer support for further assistance. | |
| Auto-Start Feature Not Responding to the tooth surface properly. | Check that the closed loop mode is on. Show see two opposite facing arrows at the bottom of the LED screen. |
| Confirm that you are within 3 mm from the tooth when you start the cure. | |
| Ensure that the Curing Light setting for Barrier Sleeve is correct. See “How do you change Barrier Sleeve and Sound settings” below. | |
| Clean the lens, do a dirty tip check and then a white calibration. | |
| If the issue persists, contact customer support for further assistance. | |
| Curing Light is too Hot. | If the Curing Light was taken off the charger, it can reach 104F or 40C during the end of charge. If the Curing Light is continuously used it will halt use and show a temperature warning before reaching a risk temperature to the patient. If the Curing Light is abnormally hot contact customer support. |
| How to turn Closed Loop On and Off. (IFU Section 1.5) | Press and hold the left button for 2 or more seconds. |
| How to Change Barrier Sleeve and Sound Settings. (IFU Section 4.3) | Press and hold both lower buttons momentarily. |
| The barrier Sleeve setting should appear. At any time press and hold both buttons momentarily to return to normal operation. | |
| Change the setting using the right button. If you use a Barrier Sleeve the left icon should be green. | |
| Press the left button to go to Beeper Setting and select on or off using the “+” button. |